Connecting Your Calendar to Nova Hub
Connecting your Google Calendar means every appointment Nova books shows up on the calendar you already use — and your existing events automatically block those time slots so you never get double-booked. Takes about two minutes.
1Open Settings
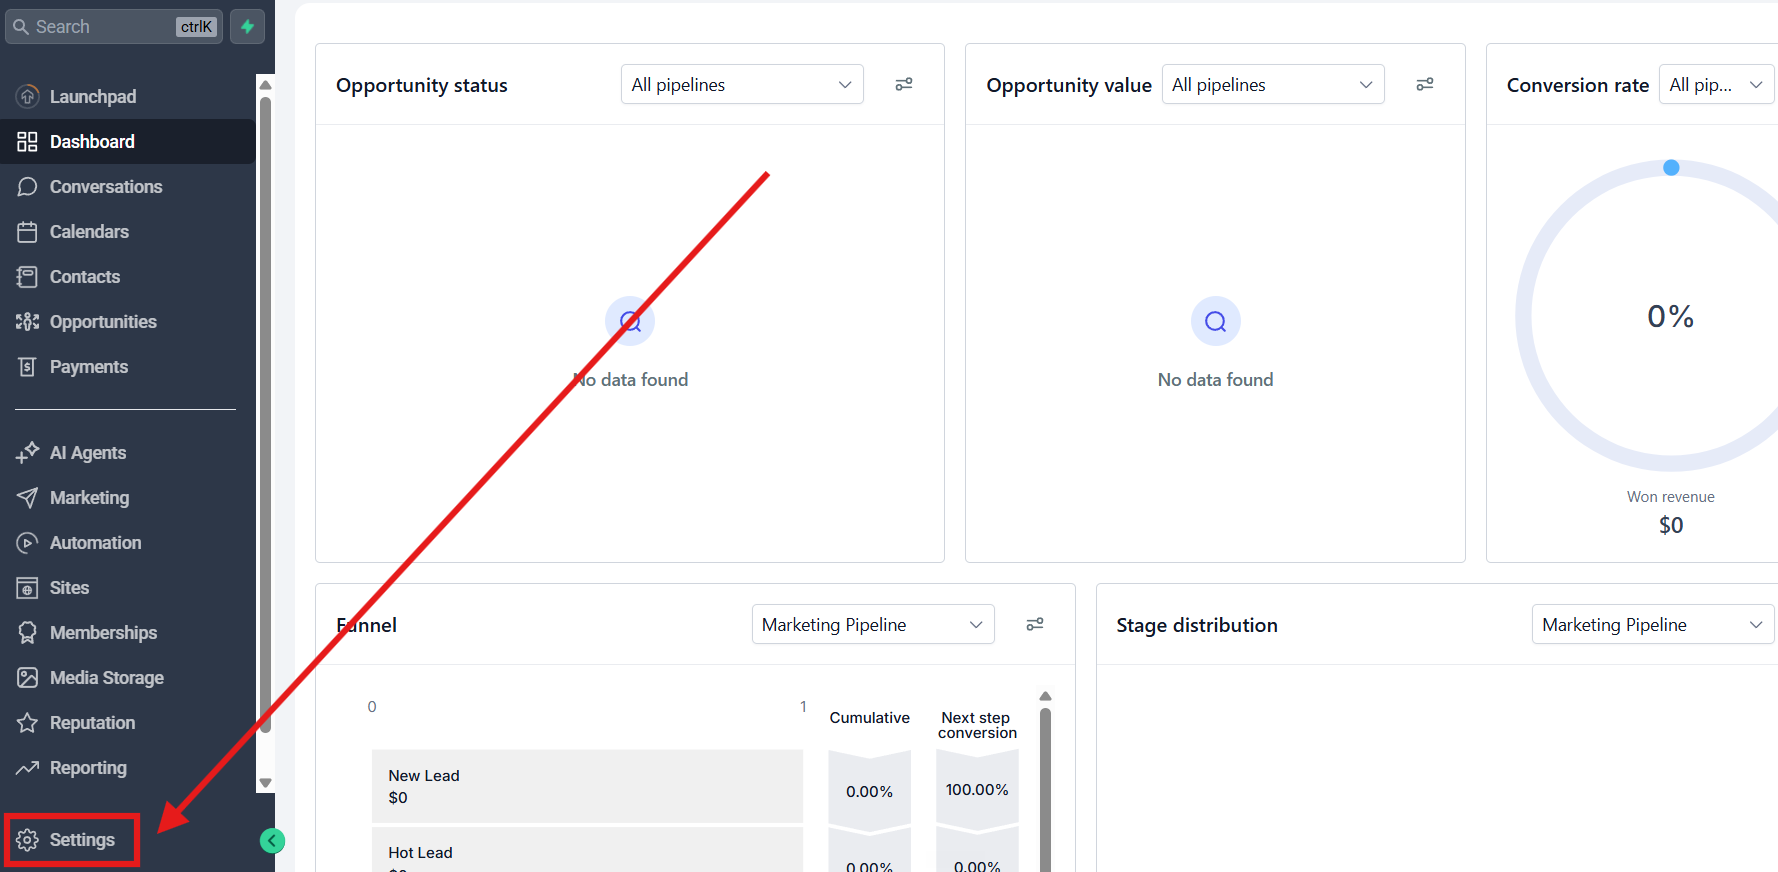
Log in at app.gohighlevel.com, then click Settings in the bottom-left corner of the menu.
2Go to your profile's calendar settings
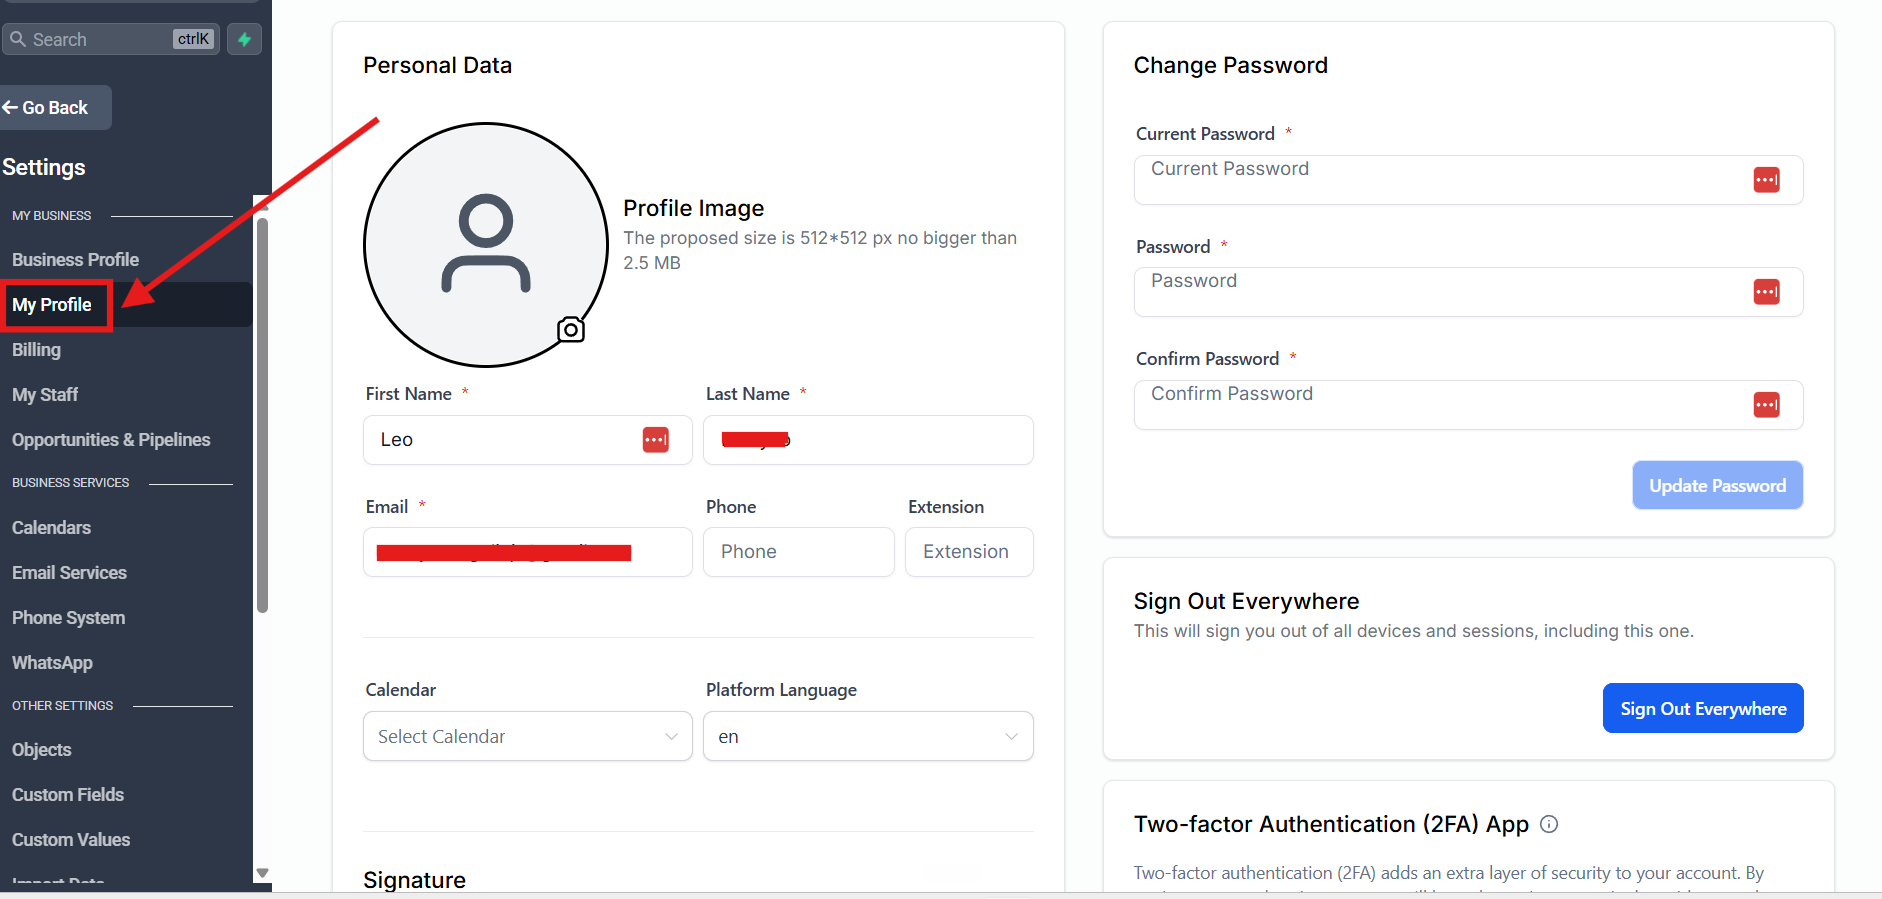
Click My Profile, then scroll down to the Calendar Settings section.
3Connect your Google account
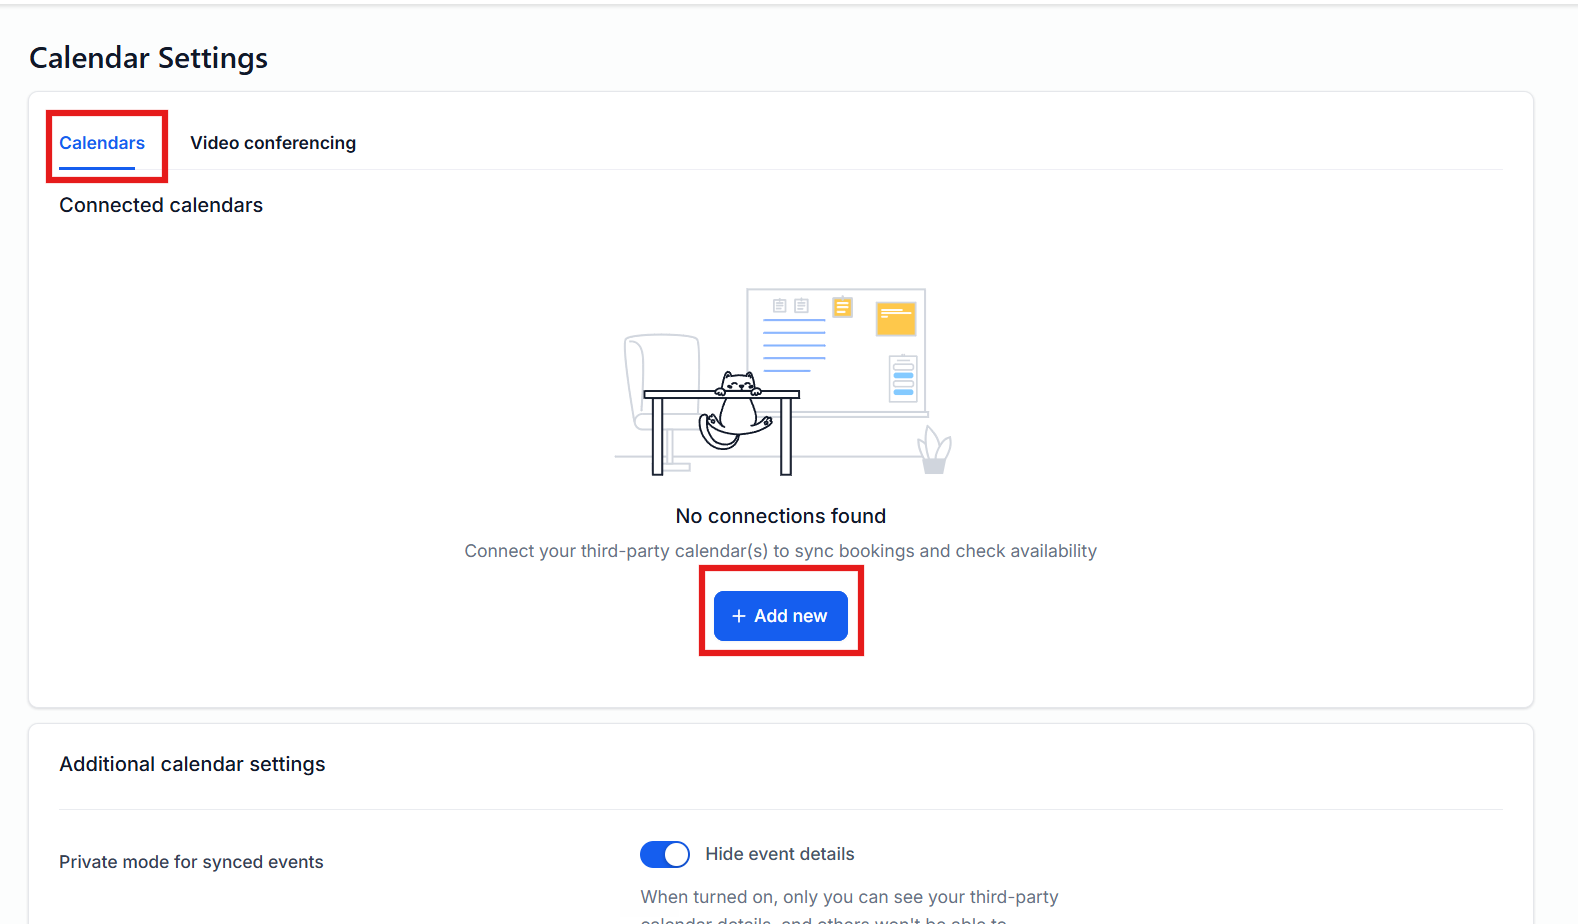
On the Calendar Settings page, make sure you’re on the Calendars tab. Under Connected calendars it will say “No connections found” if nothing is linked yet.
1. Click the blue + Add new button
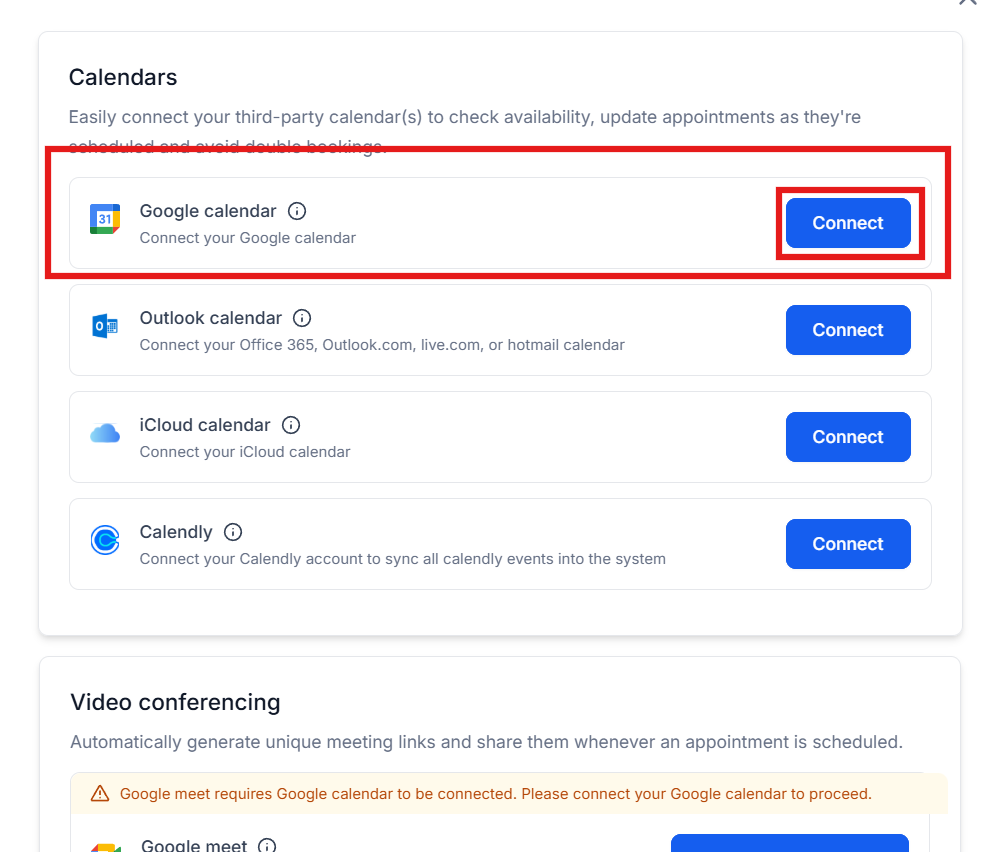
2. Choose Google
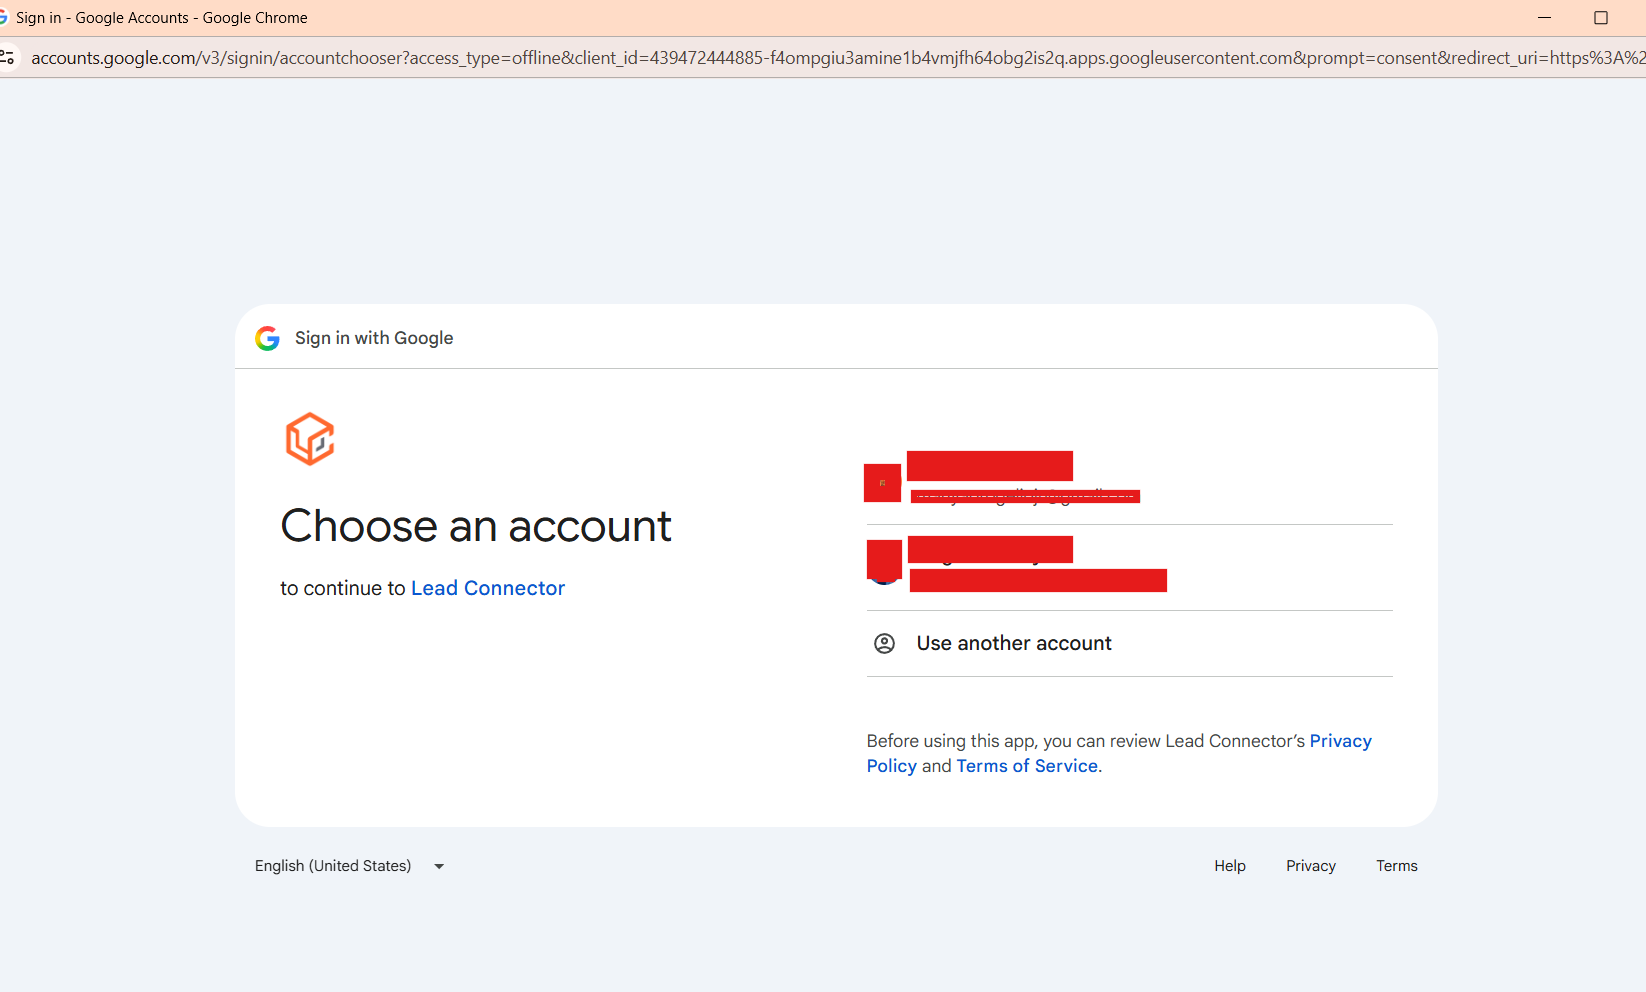
3. A pop-up window opens — “Sign in with Google — Choose an account to continue to Lead Connector”. Pick the account whose calendar you use for work.
“Lead Connector”? That’s the technology platform Nova Hub runs on — seeing that name in the Google pop-up is normal, and it’s safe to continue.
No pop-up appeared? Your browser may have blocked it — look for a “pop-up blocked” icon at the right end of the address bar, click it, and choose Always allow.
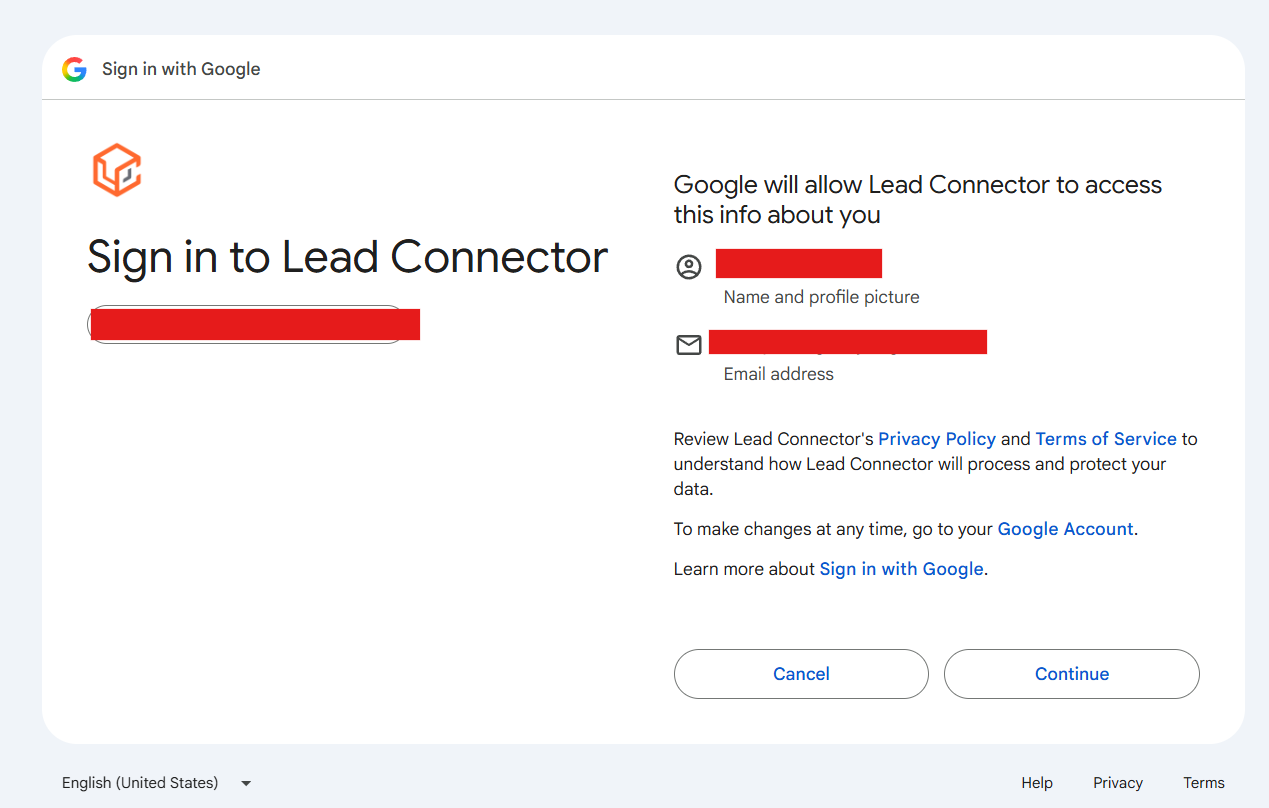
4. Click Continue — Google shows a “Sign in to Lead Connector” screen listing what will be shared (your name and email address). Click the Continue button in the bottom-right.
Your privacy: “Private mode for synced events” is on by default — only you can see the details of your personal calendar events. Nova Hub just knows when you’re busy, not what you’re doing.
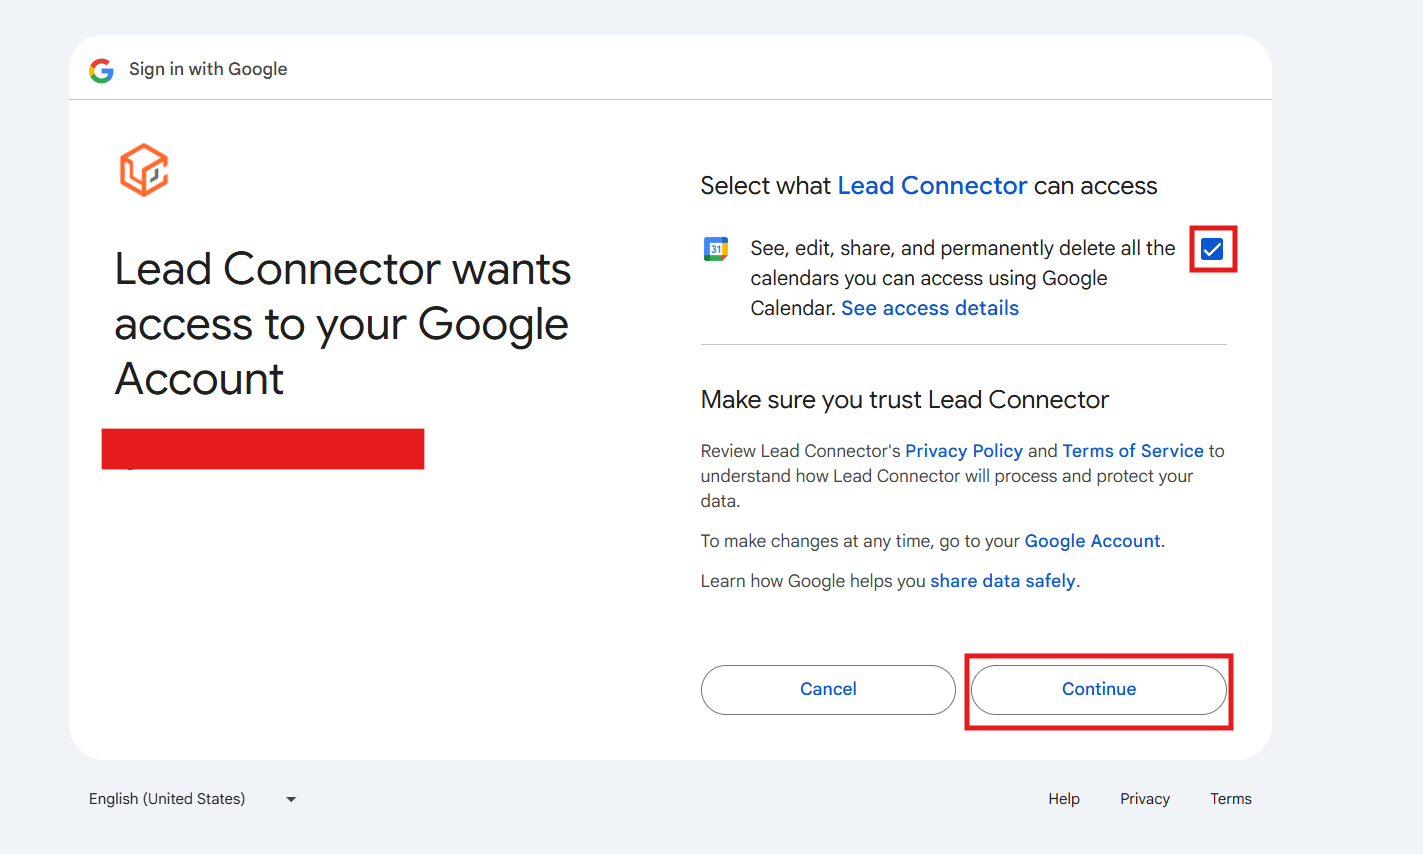
5. Grant calendar access — one more Google screen appears: “Lead Connector wants access to your Google Account”. Tick the checkbox next to the Google Calendar line under “Select what Lead Connector can access”, then click Continue.
About Google’s wording: the checkbox describes full calendar access — that’s Google’s standard text for any calendar app. In practice Nova Hub only reads your busy times and adds appointments; it never deletes or shares your calendars.
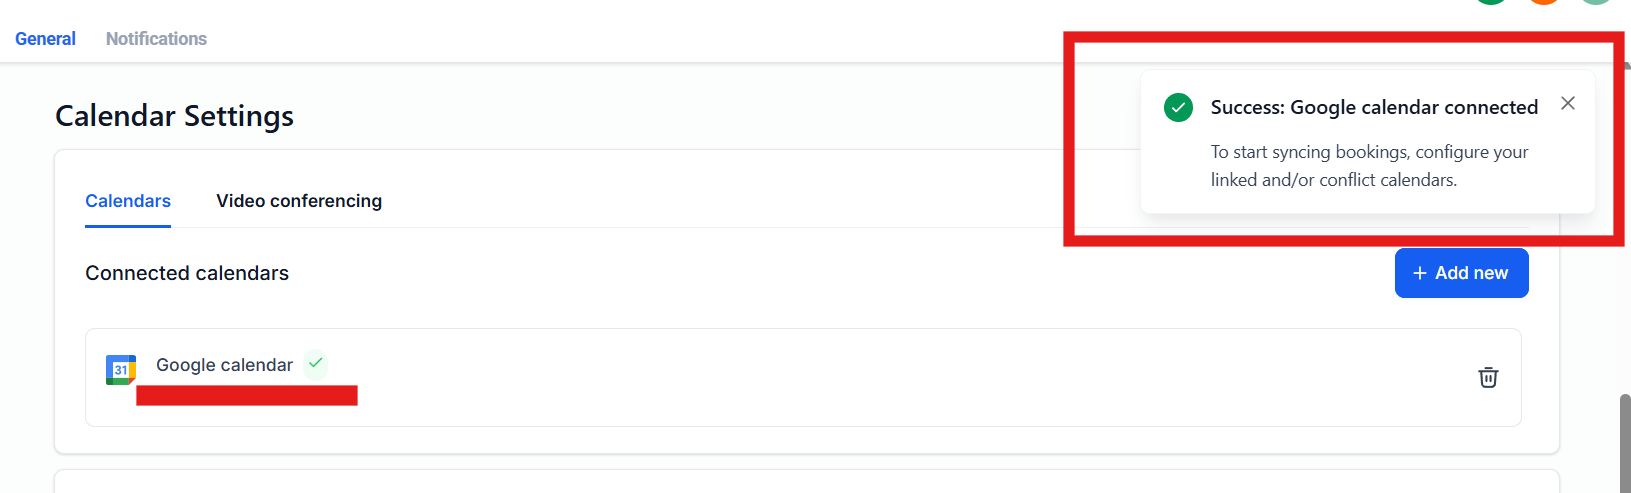
6. You’re connected! You’ll land back on Calendar Settings with a green confirmation in the top-right — “Success: Google calendar connected” — and your Google account now listed under Connected calendars with a green check.
Optional — Set your working hours
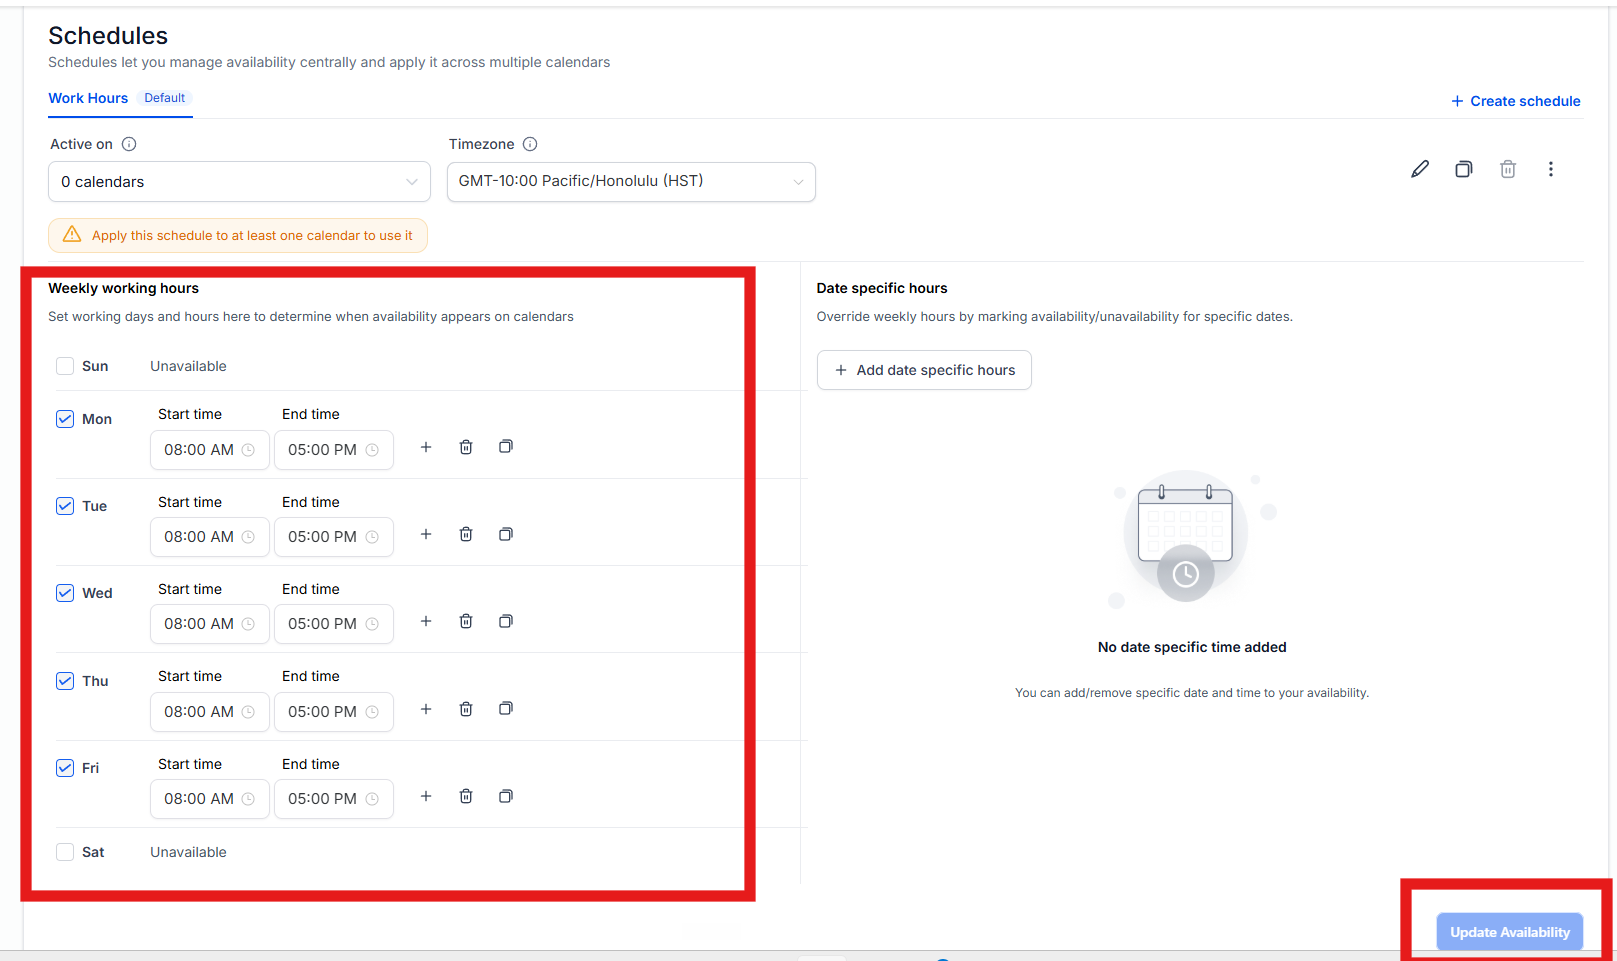
If you’d like, you can also tell Nova Hub when you work, so appointments are only ever offered during your real hours. On the same Calendar Settings page, find the Schedules section (“Work Hours”).
- Tick the days you work and set your start and end times for each day (the + lets you split a day — for example, to block out lunch)
- Check the Timezone — it should show your local timezone
- Add date specific hours to mark days off, holidays, or vacation dates
You may see a notice saying “Apply this schedule to at least one calendar” — leave that to us. Just set your hours and we’ll wire the schedule to your booking calendar on our side.
That's it! ✅
Your part is done — once your Google account shows as connected, we take it from here. Our team wires up which calendar your appointments land on and makes sure your existing events block those time slots. You don’t need to touch any other settings.
Once we’ve confirmed everything’s linked, new appointments will appear on your Google Calendar automatically — and times you’re already busy won’t be offered to callers.
Questions, or connected the wrong account? Email us at nova@9thislandai.com — we can sort it out from our side.